
STEADI: Intervene
Wheelchair Safety Checklist for Seniors at Home
Most wheelchair-related injuries in older adults are tips and falls that happen inside the home, not on the road. This three-part checklist shows caregivers and wheelchair users what to inspect on the chair, in the home, and during daily transfers to prevent the fall and breakdown scenarios behind those emergency visits.
A wheelchair safety checklist for seniors should start where the injuries actually happen: close to the bed, in the bathroom, at a doorway, during a transfer that everyone has done a hundred times before. In a national emergency department analysis of adults 65 and older using 2002–03 NEISS data, tips and falls accounted for 80.9% of wheelchair-related injuries, 94.0% occurred in homes and institutions, 17.2% of wheelchair-related emergency department visits resulted in hospital admission, transfer mishaps accounted for 12.2% of injuries, and slippery bathroom quarters were the trigger in 40.4% of injuries where a trigger was known.[1]
Those numbers are not a current live count. They are a roughly two-decade-old benchmark, and they are still useful because they name the pattern a caregiver can actually inspect: tipping, falling, transferring, wet flooring, and home layouts that ask too much of a chair user or the person helping.
That pattern also fits the wider fall-prevention frame. The CDC says more than 1 in 4 adults age 65 and older falls each year, and CDC STEADI materials identify mobility limitation as one of the factors that can increase fall risk.[2][3] The practical question, then, is not which wheelchair looks safest in a catalog. It is whether this chair, this doorway, this bathroom, and this transfer routine are still safe at 9:30 tonight when everyone is tired.
Printable quick-check summary
Use this first pass before the longer explanations. If something fails here, fix that item before treating the routine as safe. For a broader household fall plan, pair this with the Fall Prevention FAQ or a printable fall-prevention handout.
| Layer | Check before daily use | What you are trying to prevent |
|---|---|---|
| Wheelchair | Wheel locks engage firmly; tires are sound; casters roll and swivel; anti-tip devices are attached; footplates flip up; armrests are secure; seat belt or positioning belt is used only as directed; no heavy bags hang from rear handles. | Tip-overs, sliding during transfer, caster stops, foot catches, unstable push-off, and rearward imbalance.[4][5][6] |
| Home route | Paths are clear; cords and scatter rugs are gone; lighting reaches the bed, hallway, bathroom, and transfer points; thresholds are no higher than 1/4 inch; doorways give about 32–36 inches of clear opening; turning areas allow a 60-inch circle or T-turn; ramps follow safe slope, width, and landing basics. | Front caster catches, sideways squeezing, backward door pulls, unsafe turns, and ramp loss of control.[7][8][9] |
| Transfer and use habits | Chair is close to the target surface; wheel locks are set; footplates are flipped up or moved aside; the user pushes from stable armrests or the transfer surface instead of pulling on the caregiver; caregiver stands where they can assist without blocking the move. | The familiar transfer that turns into a fall because one small step was skipped.[1][4][5] |
| Bathroom | Floor is dry; non-slip surface is in place; grab bars are reachable; night lighting is available; shower, tub, and toilet transfers are not rushed. | The slippery bathroom-quarter trigger that appeared often in the benchmark injury data.[1] |
Check the chair before it becomes part of a transfer
A wheelchair can look fine from across the room and still be unsafe at the exact moment that matters. The chair is being asked to stay still while someone shifts weight, reaches, pushes, pivots, or sits down. That is where small defects and skipped habits show up.
- Wheel locks or brakes: Set both before every transfer. If a lock does not hold firmly, feels loose, or lets the wheel move when weight shifts, stop treating the chair as transfer-ready and arrange service.
- Tires and wheels: Look for low air, worn tread, cracks, looseness, wobble, or uneven rolling. A tire problem is not just a comfort issue; it changes how the chair tracks and how stable it feels during turns and transfers.
- Front casters: Make sure they swivel freely and are not catching on hair, grit, tape, carpet edges, thresholds, or bathroom mats. A stopped caster can pitch the chair forward before the person has time to correct.
- Anti-tip devices: Confirm they are attached, positioned as intended, and not removed because they were inconvenient in a tight hallway. If the chair came with anti-tip bars, taking them off changes the chair’s safety profile.
- Footrests and footplates: Before a transfer, flip footplates up or swing the footrests away as the chair design allows. Feet catching on footplates are exactly the kind of preventable detail that turns a routine move into a fall.
- Armrests: Check that armrests are locked, stable, and not cracked. If the user pushes from an armrest, that armrest has to behave like a dependable support, not like a loose accessory.
- Seat belt or positioning belt: Use it only when it is part of the chair setup, care plan, or manufacturer instructions. Do not improvise a restraint because someone seems unsteady; that is a clinical and safety question, not a household shortcut.
- Rear handles: Do not hang heavy bags, oxygen equipment, laundry, or groceries from the handles unless the chair setup is specifically designed and balanced for that load. Extra rear weight can make a chair more likely to tip backward.
General wheelchair safety guidance for older adults repeatedly returns to these same ordinary checks: brakes or wheel locks, footrests, anti-tip devices, clear technique, and avoiding loads that change the chair’s balance.[4][5][6] The point is not to turn a family member into a repair technician. It is to catch the visible problem before someone is half standing and depending on the chair to stay put.
A simple maintenance rhythm, with one rule above it
Maintenance schedules vary by chair type, manufacturer, wheel style, cushion system, and user needs. Use the owner’s manual for the specific wheelchair as the authority. If the manual says to inspect something more often than the routine below, follow the manual.
| When | Practical checks |
|---|---|
| Before each transfer or outing | Wheel locks set and holding; footplates moved out of the way for transfer; path clear; anti-tip devices present; no new bag or load hanging from the rear handles. |
| Weekly | Tires, caster movement, loose parts, armrests, footrests, cushion position, and any new squeak, wobble, pull, or drag. |
| Monthly | More careful look at bolts, upholstery, cushion wear, wheel alignment, brake adjustment feel, and whether the chair still fits the user’s posture and daily routine. |
| Any time something changes | New medication drowsiness, new weakness, a recent fall, a different caregiver, a new rug, a moved bed, a new ramp, or a chair that has been transported in a car. |
The “any time something changes” line deserves to stay on the list. Many unsafe transfers do not begin with broken equipment. They begin when the chair is two inches farther from the bed than usual, the bathroom rug has crept into the caster path, or the caregiver reaches from the wrong side because the laundry basket is in the normal standing spot.
Measure the route the chair actually uses
A wheelchair-friendly home is not proven by one wide living room. The useful route is narrower: bed to bathroom, chair to toilet, chair to shower or tub area, chair to kitchen table, chair to front door, chair to the place where coats, shoes, walkers, bags, and pets tend to collect.
- Clear the travel path. Remove scatter rugs, loose mats, cords, low baskets, shoes, pet bowls, and small furniture from the wheelchair route. Do not just push them to the side where a caster or footrest can still catch them.
- Check lighting at the hour the route is used. A hallway that looks fine at noon may be unsafe during the overnight bathroom trip. Put light where the person transfers, turns, and reaches.
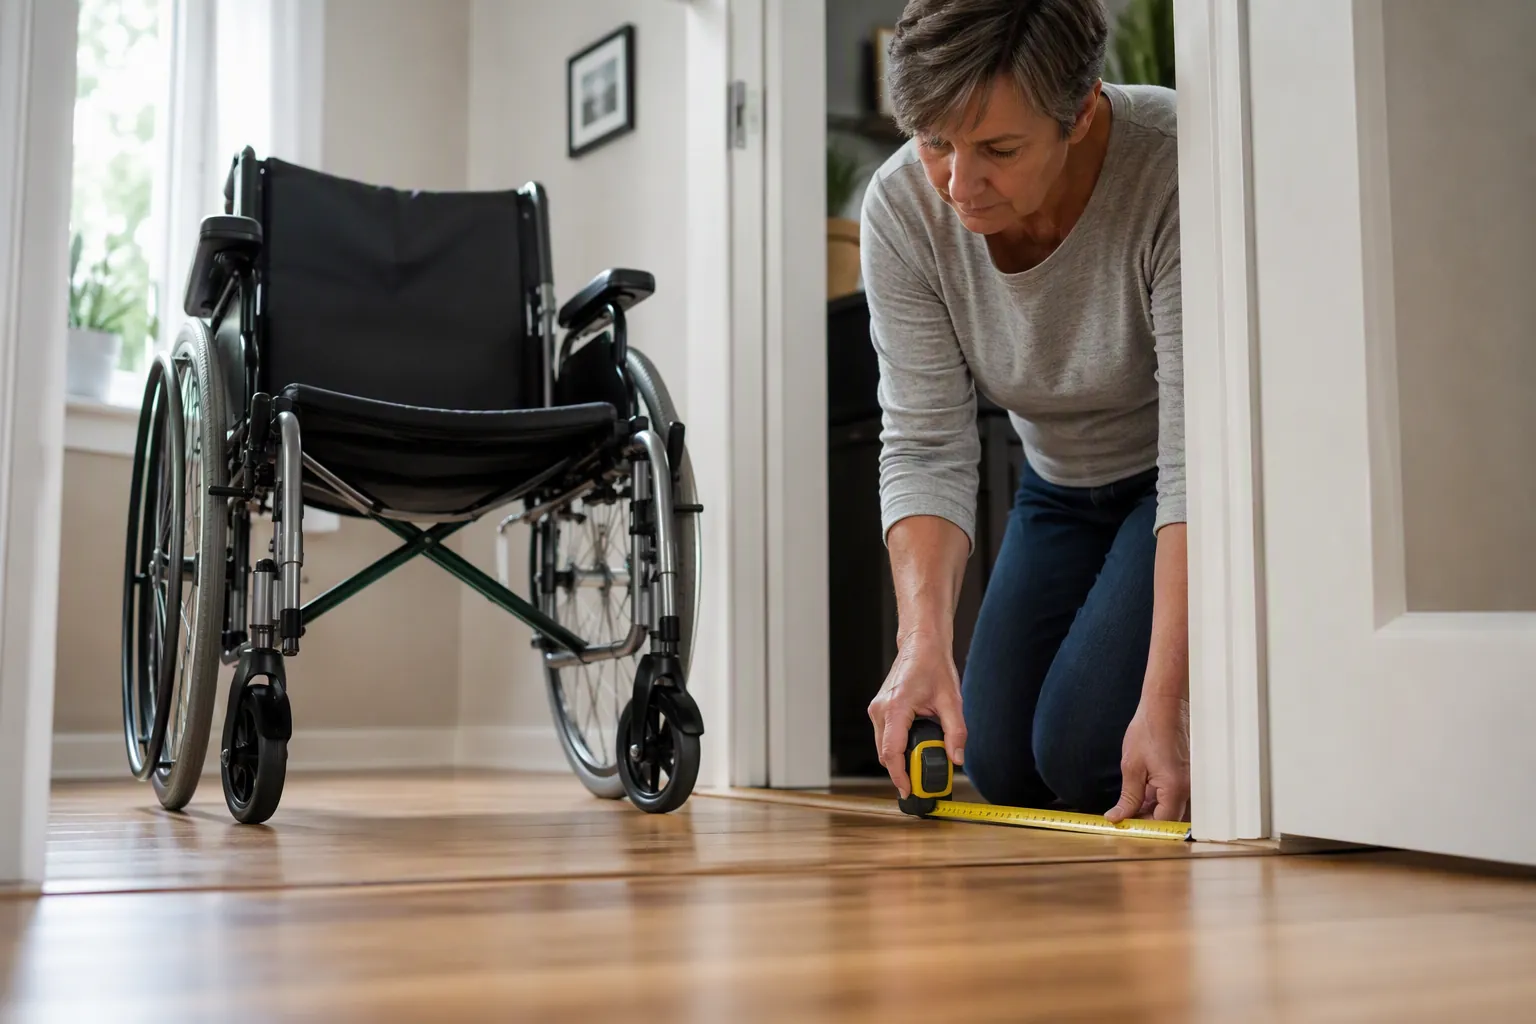
- Measure thresholds. Use 1/4 inch as the practical maximum for a vertical threshold before it needs attention. A small lip can be enough to stop a front caster or make the user lean forward at the wrong moment.[7]
- Measure doorways as clear opening, not doorframe width. A 32-inch clear doorway is a common minimum target, while 36 inches gives more working room for hands, push rims, footrests, and a caregiver beside the chair.[7][8]
- Leave turning space where turns actually happen. Plan for a 60-inch turning circle or a workable T-turn in key areas rather than making the user back, bump, and re-angle through a tight space every day.[7][8]
- Do not ignore door swing. A door that forces the user to pull backward while rolling can turn an ordinary doorway into a balance problem. If a door blocks a transfer or requires awkward backing, the route needs redesign.
If a ramp is part of the home route, use the ADA ramp figures as a safety reference: a maximum running slope of 1:12, a minimum clear width of 36 inches, and landings at the top and bottom.[9] A steeper homemade ramp may look like a solution until a tired caregiver has to control a chair going down it in the rain.
Give the bathroom its own inspection
The bathroom is not just another room with a fall risk. In the older-adult wheelchair injury benchmark, slippery bathroom quarters were the trigger in 40.4% of injuries where a trigger was known.[1] That makes the bathroom a separate checkpoint, especially for nighttime toileting, shower days, and quick cleanups when people are tempted to rush.
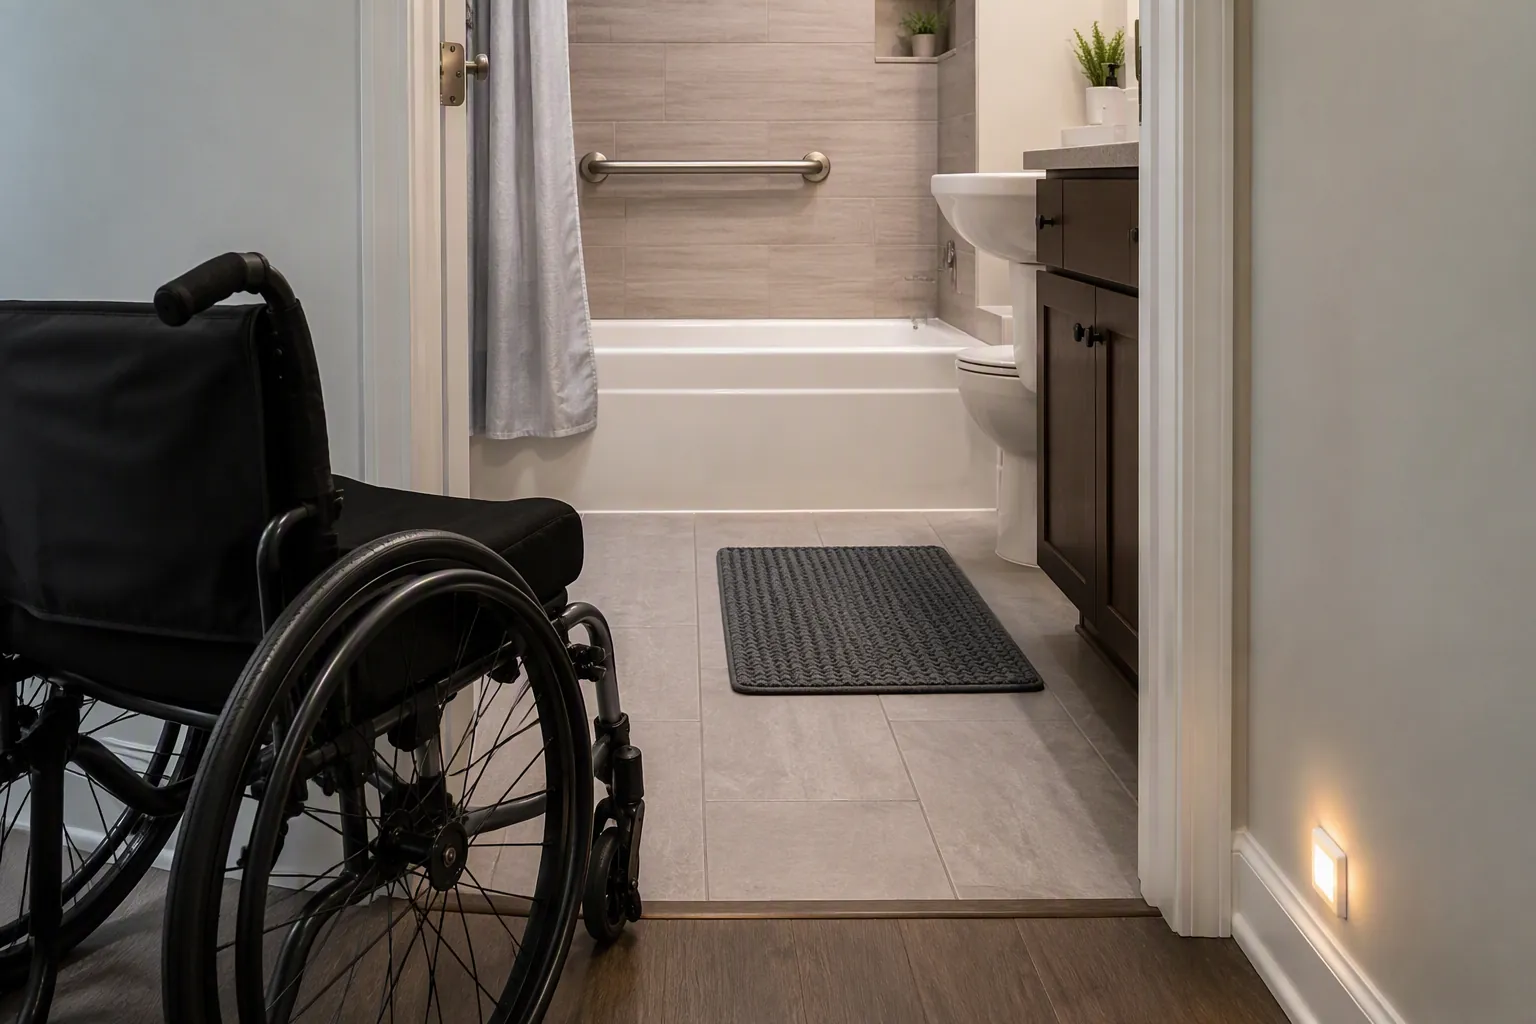
- Dry the floor before the chair enters or transfers begin. A damp patch near the tub, toilet, or sink can affect the chair, the caregiver’s footing, and the user’s transfer foot placement at the same time.
- Replace loose bath mats with stable non-slip surfaces. A mat that bunches under a caster is not a safety mat in practice.
- Put grab bars where hands naturally go during the transfer. A bar across the room may satisfy a general idea of bathroom safety while doing nothing for the real movement from chair to toilet or chair to bathing surface.
- Light the base of the route. Night lights should help the user and caregiver see floor edges, footplates, wheels, and any water on the floor.
- Keep supplies within reach before the transfer starts. Towels, wipes, clothing, and continence products should not require someone to twist, lean, or roll away mid-transfer.
Transfers: the step where the checklist has to become habit
A transfer is not one action. It is a short chain of actions, and the skipped link is usually ordinary: the brakes were almost locked, the footplate was almost out of the way, the chair was close enough yesterday, the caregiver was only going to help for a second.

- Put the chair close to the target surface. The bed, toilet, shower chair, recliner, or car seat should be close enough that the transfer does not become a reach.
- Angle the chair for the actual movement. The best angle depends on the person’s strength, weaker side, transfer method, and equipment. If the family is guessing, that is a reason for an occupational therapy assessment.
- Lock both wheels before weight shifts. Do this before the person scoots forward, reaches, stands, or pivots. A chair that moves during the first push is already too late.
- Move the footplates out of the path. Flip them up or swing them away according to the chair design. Then look at the feet, not just the footplates.
- Use stable push points. When appropriate for the person’s abilities, pushing from the armrests or transfer surface is safer than pulling on a caregiver’s neck, shoulders, or hands. The caregiver should not become the main handle for the move.
- Place the caregiver where help does not block the transfer. Standing in the wrong spot can force the wheelchair user to twist, reach around, or change direction mid-transfer.
- Pause if the setup is wrong. Do not continue because the person is already halfway forward. Reset the chair, surface, feet, caregiver position, and brakes.
Consumer health guidance on wheelchair safety for older adults consistently emphasizes transfer setup: brakes locked, footrests moved, close positioning, safe hand placement, and avoiding awkward pulls.[4][5][6] Those steps sound basic until the night they prevent a fall.
Two habits that deserve special attention
First, do not pull backward on doors from the wheelchair if it makes the chair roll back, twist, or tip. A doorway problem should be solved by changing the route, hardware, door swing, or assistance plan, not by asking the chair user to perform a risky maneuver every day.
Second, keep frequently used items where they can be reached without leaning far outside the chair. Reaching to the floor for a dropped towel, stretching toward a nightstand, or twisting for a phone charger may look harmless from across the room. From the chair, it can shift weight past the base of support.
When to stop checking and call someone
Some findings are not household fixes. Call the wheelchair dealer, service provider, or manufacturer-approved repair contact when wheel locks do not hold, tires will not stay properly inflated, casters wobble or jam, the frame feels loose, anti-tip devices are missing or damaged, armrests or footrests do not lock, the chair pulls to one side, or any part has changed after transport or a fall.
Ask for an occupational therapy or home safety assessment when the transfer method is being improvised, the caregiver is lifting more than guiding, the chair no longer fits the person’s strength or posture, the bathroom route cannot be made simple, or the family is debating grab bar placement, bed height, ramp use, or whether a different transfer aid is needed.
After a fall from the chair, do not treat embarrassment as the main problem. Watch for pain, head impact, dizziness, confusion, new weakness, inability to bear weight as usual, or any change from the person’s baseline, and seek medical advice promptly when injury is possible. Also inspect the chair before it is used again; a bent footrest, loosened brake, shifted cushion, or damaged anti-tip device can set up the next fall.
Wheelchair safety at home is not solved by one device or one warning label. It is maintained by repeated checks across equipment, space, and habits, with the owner’s manual and qualified professionals stepping in whenever routine checking finds something uncertain or unsafe.
References
- Wheelchair related injuries treated in US emergency departments, Injury Prevention, 2006
- Facts About Falls, CDC
- Patient & Caregiver Resources, CDC STEADI
- How to Use a Wheelchair Safely — Wheelchair Safety for Older Adults and Their Caregivers, Healthline
- Wheelchair safety for older adults, Medical News Today
- Wheelchair Safety Tips for Seniors, One Medical
- Basic Modifications for a Wheelchair-Friendly Home, Harmony Home Health
- Your Home Checklist for Aging in Place, AARP
- Chapter 4: Ramps and Curb Ramps, U.S. Access Board
Related reading
Noticed something outdated or inaccurate on this page? Flag a correction. We review every report against CDC, NIA, and AARP HomeFit guidance before updating a page.
Part of the Fall Prevention section.