
Caregiver decision guide
How to Check an Assisted Living Bathroom for Hidden Cameras
Learn how to inspect an assisted living bathroom for hidden cameras using a five-minute protocol that combines a visual and physical sweep, a flashlight glint test, a smartphone infrared scan, and a Wi-Fi network check. The guide also covers where cameras commonly hide, the legal reality that bathrooms carry the highest privacy protections, and the exact steps to take if you find a suspicious device.
Start at the bathroom door with two things in your hand: a bright flashlight and a smartphone. A careful hidden-camera check in an assisted living bathroom can usually be done in about five minutes if you move in a fixed order instead of staring at the room and guessing. The point is not to accuse anyone on sight. It is to protect a private space where bathing, toileting, dressing, and embarrassment all live close together.
The best first pass is simple: look for tiny lens openings, use a flashlight to catch glass reflections, scan in the dark with your phone camera for infrared LEDs, check the mirror, and only then do a cautious Wi-Fi scan. Hidden-camera detection guides from eufy and Panda Security describe these same basic tools: visual inspection, flashlight reflection, infrared detection with a phone camera, and network review for unfamiliar connected devices.[1][2]
The five-minute bathroom check
Before you begin, tell your parent what you are doing in plain language if they can understand and consent to the check. Something like, “I’m going to look around the bathroom for anything that does not belong here,” is enough. Keep the room as you found it. Do not unscrew plates, pull down vents, or pry open objects. If something is wrong, you want the evidence intact.
| Minute | What to do | What you are looking for |
|---|---|---|
| 0:00-1:30 | Visual and physical sweep | New, crooked, loose, oddly aimed, or unnecessary objects |
| 1:30-2:30 | Flashlight glint test | A blue-white lens reflection from a pinhole or dark opening |
| 2:30-3:30 | Smartphone infrared scan | Bright white or purple dots in darkness |
| 3:30-4:15 | Mirror check | No gap between fingertip and reflection, or unusual mirror construction |
| 4:15-5:00 | Cautious Wi-Fi check | Unfamiliar camera-like device names on a network you are authorized to view |
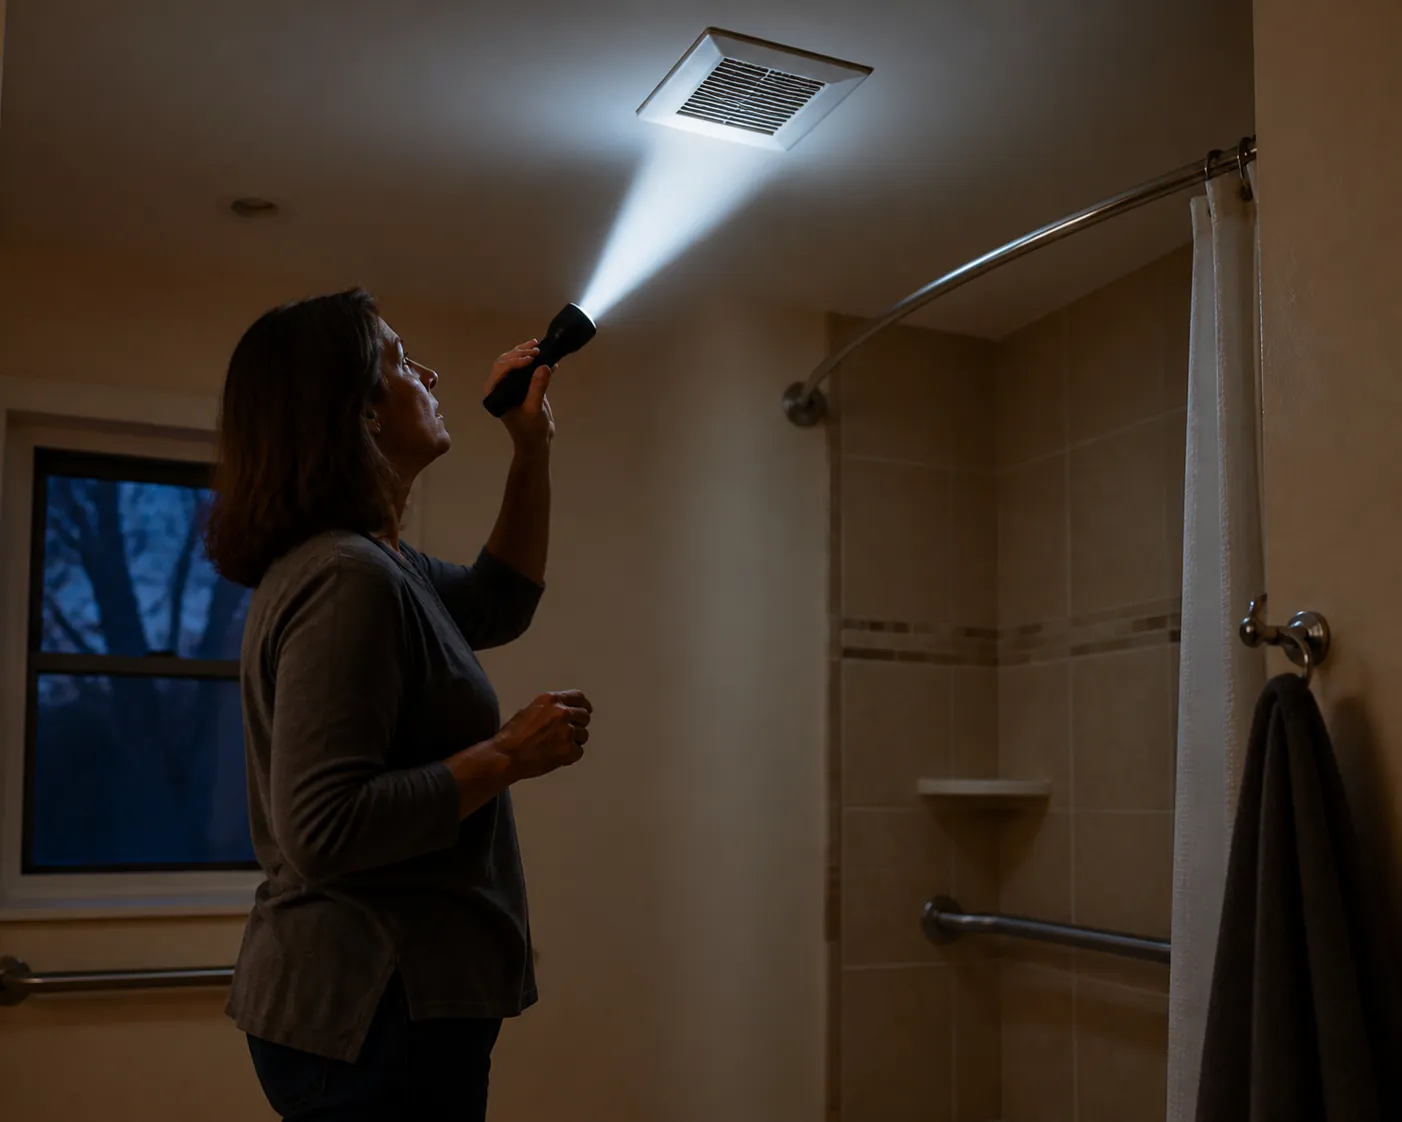
1. Sweep the fixtures that can hide a lens
Stand still for a moment and look for what changed. A bathroom camera does not need much space. Detection guides list common hiding places such as air fresheners, vent covers, outlet plates, smoke detectors, wall clocks, night lights, towel hooks, soap dispensers, and toilet paper holders.[1] In an assisted living bathroom, those are exactly the objects that can be explained away as maintenance, housekeeping, fall prevention, odor control, or convenience.
- Ceiling and wall vents: look through the slats for a small dark circle, a tiny glass point, fresh screws, disturbed dust, or a vent cover that sits differently from the others.
- Outlet covers and switch plates: check for pinholes, plates that are slightly crooked, new plastic, unexplained adapters, or a night light that stays in place even during the day.
- Smoke detectors and sensors: note anything aimed toward the toilet, shower, changing area, or mirror instead of serving an obvious safety function.
- Air fresheners, tissue boxes, soap dispensers, and clocks: pick them up only if they are ordinary loose items and do not appear attached; look for a lens-sized opening facing the room.
- Towel hooks, robe hooks, toilet paper holders, grab-bar ends, and shelf brackets: look at the face of the object, not just the wall around it.
- Shower area: check shampoo caddies, showerheads, curtain rods, built-in shelves, and any object with a direct view of bathing or dressing.
Do not treat every odd thing as proof. A crooked wall plate may be lazy maintenance. A new air freshener may be exactly that. What matters is whether an object has a view of private activity, has a small opening or reflective point, appears newly placed, or has no reasonable bathroom purpose.
2. Use the flashlight glint test
Turn off the bathroom light if you can do so safely. Hold the flashlight near your eyes and sweep slowly across vents, outlet plates, hooks, dispensers, ceiling devices, and any dark opening. Camera lenses can reflect a distinct blue-white glint when light hits them directly, which is why flashlight inspection is a standard hidden-camera detection step.[1][2]
Move your body, not just the flashlight. A lens may only flash from one angle. If you see a glint, pause and photograph the object from where you stand. Then take a second photo with the room light on so the location is clear. Do not press your eye to the object or try to open it.
3. Scan in the dark with your phone camera
Some hidden cameras use infrared LEDs for low-light recording. In a dark room, a smartphone camera may show those infrared points as bright white or purple dots, depending on the phone and camera.[1] This does not find every camera. It mainly helps with cameras that are actively using infrared light.
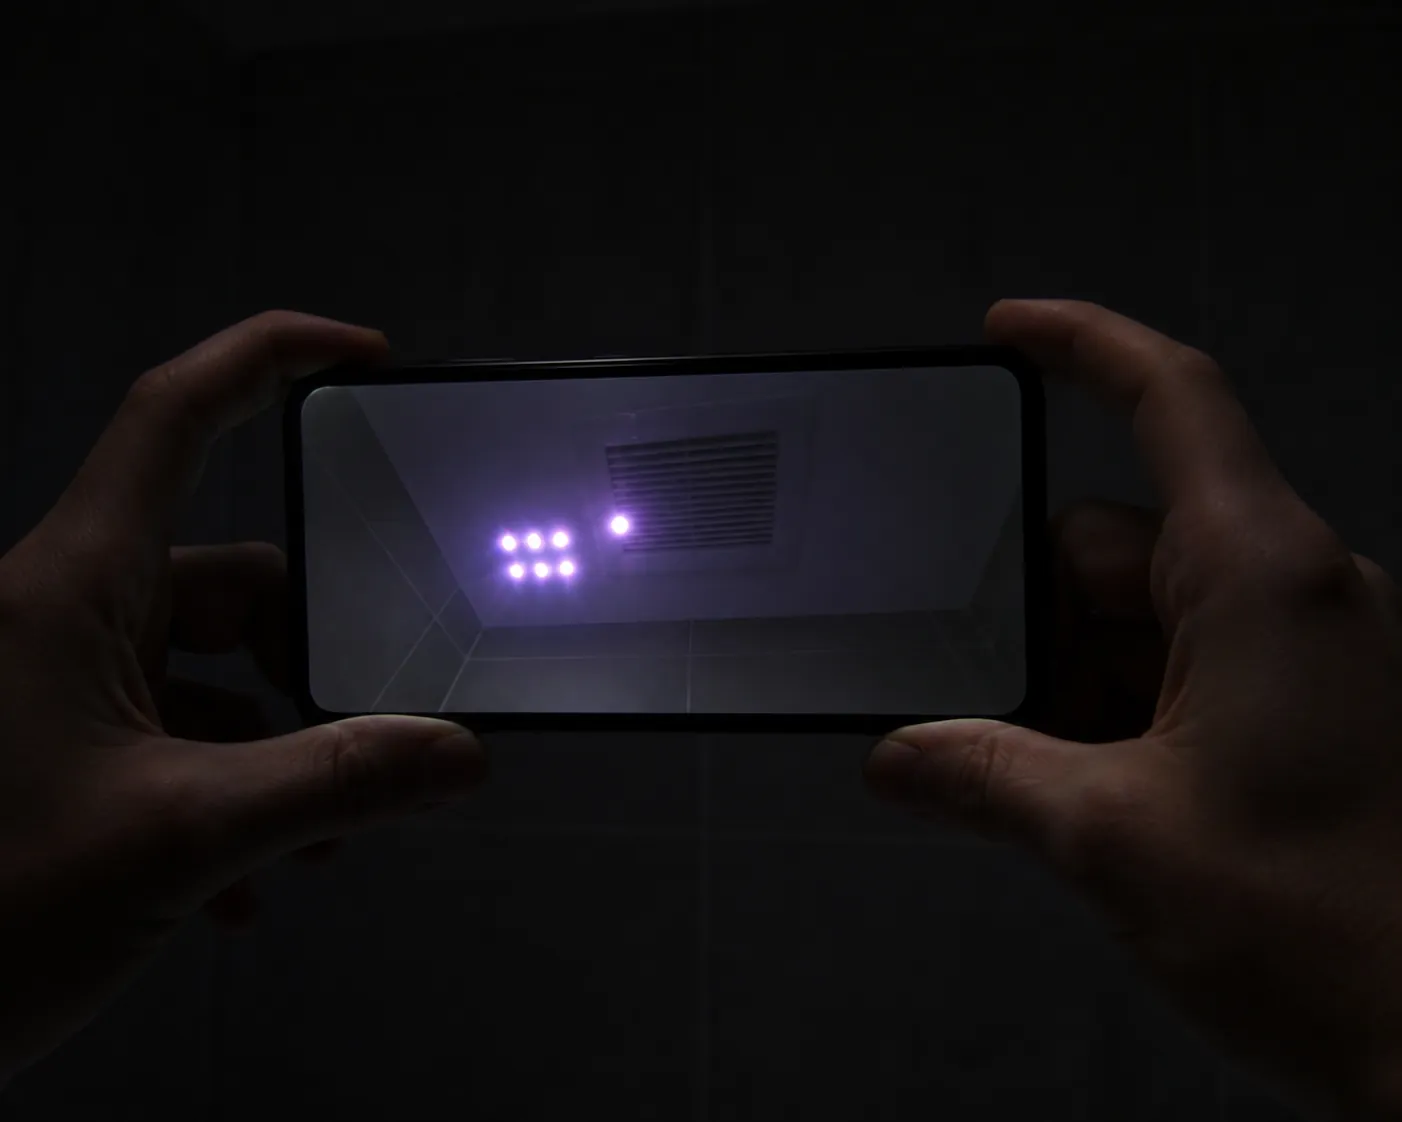
To test whether your phone can see infrared, point a TV remote at the phone camera and press a button. If you see a flashing light on the phone screen, that camera can detect at least some infrared. Some rear phone cameras filter infrared more strongly than front cameras, so try both if you are unsure.
- Turn off the bathroom lights and close the door enough to darken the room.
- Open the phone camera; do not use flash.
- Point the camera slowly at vents, outlets, smoke detectors, air fresheners, hooks, dispensers, toilet paper holders, shelves, and the mirror area.
- Watch the phone screen for bright white or purple dots that stay fixed in one object.
- If you see a dot, photograph or record the phone screen and the object’s location without touching the object.
A clean phone scan is reassuring, but it is not a guarantee. A camera that records to a local memory card, uses visible light, or does not have infrared LEDs may not appear this way. That is why the phone scan is one part of the check, not the whole check.
4. Check the mirror without turning it into a science project
Bathroom mirrors deserve a separate moment because they face dressing, bathing, toileting routines, and personal care. eufy describes the fingertip test this way: place a fingernail against the mirror; if there is no gap between the nail and its reflection, the mirror may be two-way and should be treated as suspicious until explained.[1]
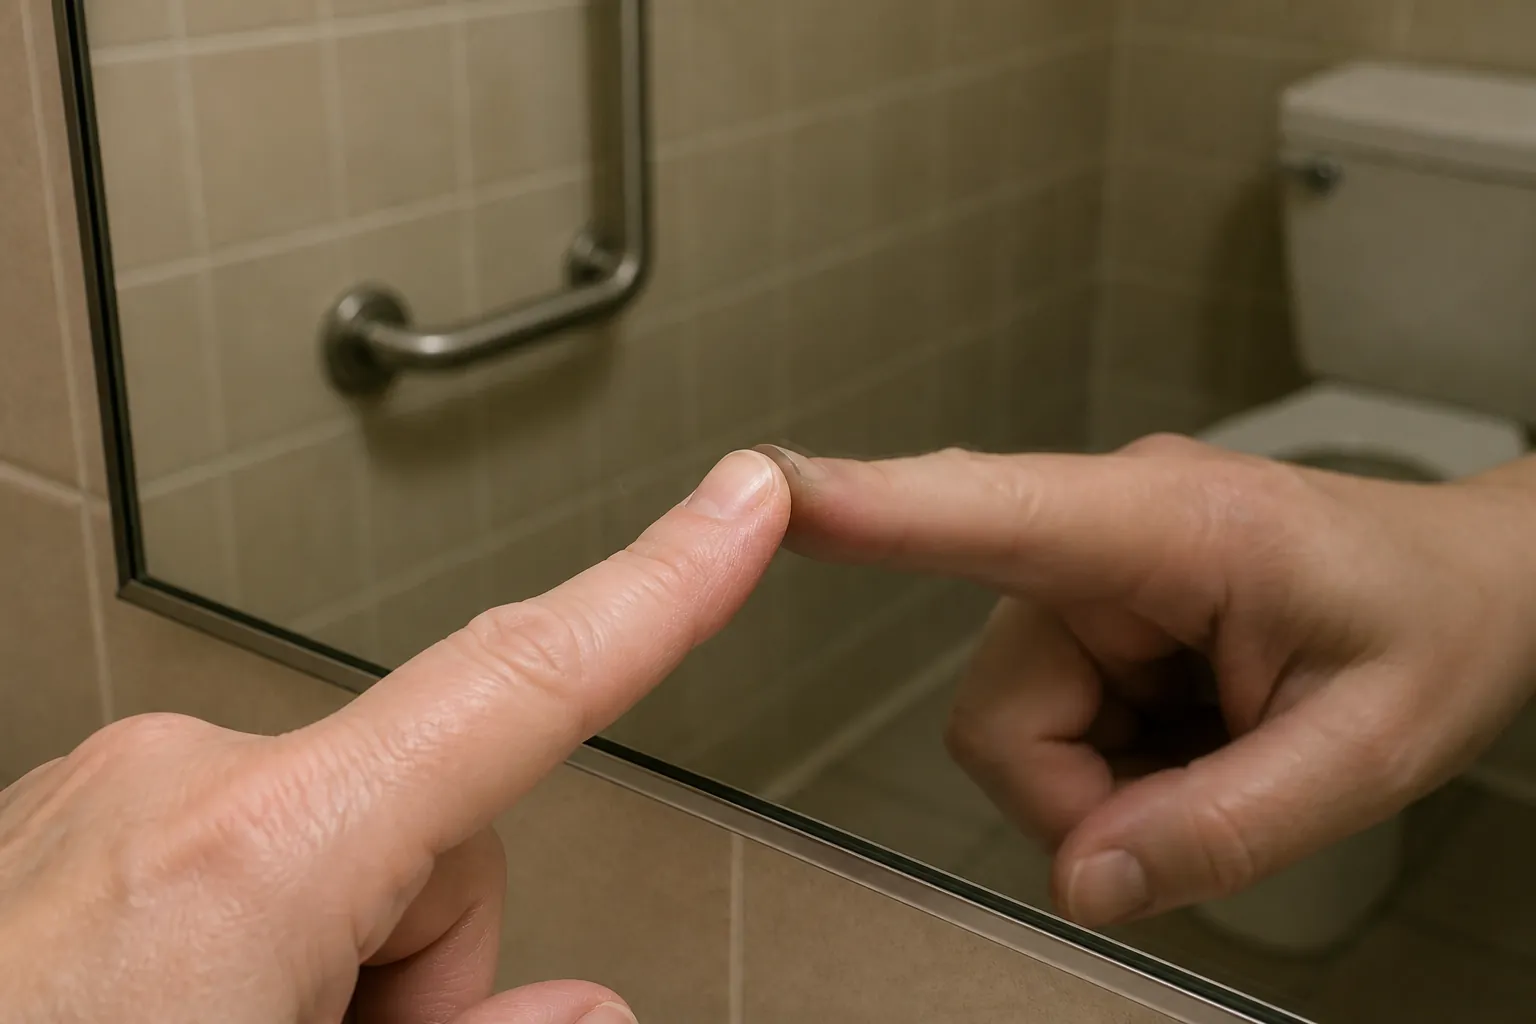
The fingertip test is a warning sign, not a verdict. Mirror thickness, backing, lighting, and construction can affect what you see. What raises the concern is a no-gap result combined with other facts: a mirror built into a cabinet or wall, an unexplained space behind it, a small opening nearby, or a mirror that was recently replaced.
5. Do a cautious Wi-Fi check
A Wi-Fi scan can help if the bathroom camera is connected to a network you are authorized to access, such as your parent’s private router or a resident network that allows device viewing. Some detection guides recommend checking for unfamiliar connected devices as part of a hidden-camera search.[1][2]
Use this step carefully. A strange device name is not proof of a camera. It could be a printer, thermostat, tablet, nurse-call device, or another resident’s device on a shared network. And the reverse is also true: a camera that saves footage to a local SD card may never show up on Wi-Fi. Write down device names that look camera-related, but do not make the Wi-Fi list your only evidence.
How to read what you find
After the sweep, sort what you saw into three groups: ordinary, explainable but worth noting, and suspicious. This keeps concern from turning into certainty too quickly.
| Finding | What it may mean | What to do next |
|---|---|---|
| Dusty vent, old outlet plate, ordinary soap dispenser | Probably routine bathroom equipment | No action unless something changes |
| New air freshener, crooked wall plate, unfamiliar night light | Could be ordinary maintenance or a placement worth asking about | Photograph it and ask the facility to identify it in writing |
| Pinhole facing toilet or shower, lens glint, fixed IR dot, hidden wire, unexplained device | Potential recording device | Do not touch it; document and report immediately |
| Unknown Wi-Fi device name | Possible connected device, but not proof | Record the name and pair it with physical evidence before escalating |
The object’s line of sight matters. A device in a hallway aimed at an exit is different from a device in a bathroom aimed at a toilet, shower, changing area, or mirror. The more private the activity in view, the less room there is for a harmless explanation.
Why bathrooms are different under privacy rules
Assisted living camera laws vary by state, and the rules for assisted living are not always the same as the rules for nursing homes. Some states have created frameworks for resident-room cameras, consent forms, roommate notice, signage, or family-installed monitoring. Those debates matter in bedrooms and common areas. They do not make a bathroom negotiable.
Security.org’s 2026 guide to camera placement law identifies bathrooms as places with the highest reasonable expectation of privacy under federal and state privacy principles.[3] Wisconsin’s Department of Health Services gives a concrete assisted living example: its guidance says providers shall not place electronic recording, video monitoring, or filming equipment in bathrooms or shower rooms.[4]
That does not mean every state uses the same wording or enforcement path. It does mean a facility policy, a vague safety explanation, or a general consent form should not be accepted as an answer to a camera in a bathroom. If recording equipment appears to capture toileting, bathing, dressing, or personal care, treat it as a privacy emergency and preserve evidence.
If something looks like a camera, do this in order
The order matters because pulling a device down can destroy evidence, and arguing in the hallway can turn a privacy problem into a confused dispute about damage, permission, or misunderstanding. Guidance for families dealing with cameras in assisted living emphasizes documenting the device, notifying the facility, contacting the long-term care ombudsman, and escalating when needed.[5]
- Do not touch, remove, unplug, unscrew, or open the device.
- Photograph it from several angles, including one wide photo that shows where it is in the bathroom.
- Record the date, time, room number, who was present, and what prompted the inspection.
- If privacy is at immediate risk, cover the object without damaging it, using something temporary such as a towel, paper, or tape placed over the line of sight.
- Move your parent out of the bathroom area if they need to bathe, toilet, or change before the issue is addressed.
- Notify the facility director or administrator in writing and ask for a written response identifying the object and who placed it there.
- Contact your state long-term care ombudsman program, which NewLifestyles describes as a free and confidential resource for residents and families navigating these concerns.[5]
- Call law enforcement if the device appears to be recording, transmitting, hidden, or intentionally aimed at toileting, bathing, dressing, or personal care.
Keep the written notice short. State what you found, where it was, when you found it, and what you are asking the facility to do. Avoid guessing who placed it. Ask that the device be preserved, that the bathroom not be used until the privacy concern is resolved, and that the facility respond in writing.
A workable message can be this simple: “Today at 2:15 p.m., I found an unexplained device in my father’s bathroom, located on the wall vent above the shower and aimed toward the bathing area. I photographed it and have not touched or removed it. Please preserve the device, identify who placed it there, confirm whether it records or transmits audio or video, and respond in writing today. Until this is resolved, my father should not be expected to use that bathroom for bathing or toileting.”
What not to do
Do not post photos publicly before you have reported the device through safer channels. Do not accuse a specific aide, housekeeper, maintenance worker, roommate, visitor, or family member unless there is clear evidence. Do not secretly install your own camera in response; family-installed monitoring is a separate legal and ethical issue, especially in shared or care-related spaces.
Also do not let a calm explanation end the matter if the device was hidden or aimed at private activity. “It is for safety” is not enough. “Everyone signed a form” is not enough. “Maintenance put it there” is not enough. In a bathroom, the facility needs to identify the object, preserve it if it may be evidence, and answer in writing.
When to repeat the check
Make the bathroom check part of normal room safety, not a one-time panic. Check at move-in, after maintenance or repair visits, after new equipment appears, and monthly after that. The same routine can sit beside ordinary bathroom safety checks for water temperature, grab bars, rugs, lighting, and fall hazards.
The goal is not to make every visit feel suspicious. It is to have a repeatable privacy check that takes about five minutes, uses tools you already have, and gives your parent the dignity of knowing the bathroom is still private.
References
- How to Find Hidden Cameras: A Complete Guide, eufy
- How to Detect Hidden Cameras: 8 Ways to Protect Your Privacy, Panda Security
- Legality of Security Camera Usage & Placement in 2026, Security.org
- Guidance for the use of Electronic Recording, Video Monitoring, or Filming Equipment, Wisconsin Department of Health Services, June 2026
- Are Hidden Cameras Legal to Use in Assisted Living Facilities in 2026?, NewLifestyles
Questions to bring to a clinician or OT
This is not medical, legal, or a family's final decision — only a framework. Bring these questions to a clinician, occupational therapist, or your local Area Agency on Aging.
Find Local HelpRelated reading
Noticed something outdated or inaccurate on this page? Flag a correction. We review every report against CDC, NIA, and AARP HomeFit guidance before updating a page.